Sage User Configuration Guide
Last updated: June 15, 2026
Authorization
Subscribe to Web Services
Enable the Web Services subscription
1. Go to Company -> Admin & Subscriptions
2. Find ‘Web Services’ and click on it to Subscribe
3. Ignore the warning about additional charges

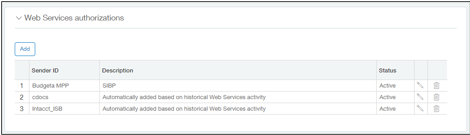
Sender ID
Add Tab’s Sender ID (tabsplatformmpp) to the allowed list.
1. Company -> Company Info
2. Click EDIT
3. Click on the ‘Security’ tab
4. Go to the section labeled “Web Services authorizations” and add the Sender ID
Authorize Client Application (REST API only)
Add Tab’s Client ID (54960878527263d8e380.app.sage.com) to the allowed list.
1. Company -> Company Info
2. Click EDIT
3. Click on the ‘Security’ tab
4. In the Authorized Client Applications section, click Add
5. Enter your Tab’s application Client ID (54960878527263d8e380.app.sage.com)
6. Enter the Web Services User ID (this field is case-sensitive, enter it exactly as it was created)

User Permissions
Create User with Role-Based Security
Create a Role
1. Company -> Roles
2. Click ADD
3. Input a ‘Name’
4. Click SAVE
5. Click on the full Permissions for each applicable module
a. Company
b. Accounts Receivable
c. Cash Management
d. General Ledger
e. Order Entry
6. Click SAVE
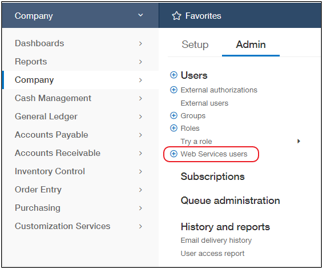
Create Web Service User
1. Company -> Web Service User
2. Click NEW
3. Input values for these fields
a. User ID
b. Last name
c. First name
d. Email address (sage-integrations+YourCompanyName@tabs.inc)
e. User Type = Business User
f. Admin privileges = Full
4. Click on the ‘Roles information’ tab and select the Role created in the prior step.
5. Click SAVE
6. Ignore any warning that there will be a charge for creating the User
Common Issues
"Web Services user [user] is not authorized to use OAuth client [client]."
To fix this: In Sage Intacct, navigate to Company > Setup > Company > [Edit] > Security > Authorized Client Applications and associate your Web Services user with the authorized client application, or add one if it doesn't exist.
"The Web Services user does not have sufficient permissions to perform this operation."
To fix this: In Sage Intacct, go to Company > Admin > Web Services users > Edit the user > Sage Intacct Financials permissions > Add a role that grants the necessary permissions.